
How to Choose an Ultrasonic Denture Cleaning Machine
Choosing an Ultrasonic Denture Cleaning Machine is not simply a matter of selecting the most powerful model. The right choice depends on the denture material, cleaning routine, and manufacturer’s care instructions. Prosthodontist Dr. David Felton’s clinical perspective offers a useful anchor: denture care should suit both the appliance and the person wearing it, rather than follow a one-size-fits-all routine. Treat that as a practical summary, not a verbatim quotation.
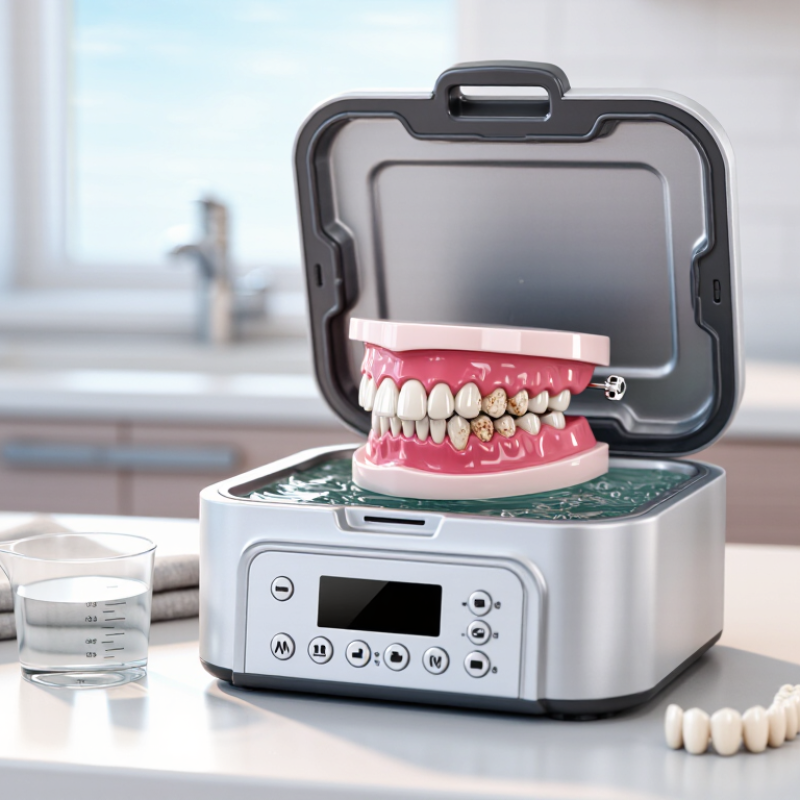
Picture a denture with dried residue around its clasps, resting in a small stainless-steel tank. Tank capacity, cycle length, and ease of cleaning matter in daily use. So do stable controls and clear operating instructions. Some machines advertise high-frequency performance, but a specification alone cannot show whether a device suits your particular denture. Check the denture maker’s guidance before using ultrasonic cleaning, especially with soft liners, repairs, or delicate components.
A sensible comparison also considers noise, warranty terms, replacement parts, and the effort needed to keep the tank clean. Look for instructions that explain water levels and suitable cleaning solutions. Avoid assuming that ultrasonic action replaces brushing or other recommended care. It may not. One imperfect part of choosing is that product claims can be easier to compare than real-world cleaning results. Ask your dentist or prosthodontist when material compatibility is uncertain. The best Ultrasonic Denture Cleaning Machine is one that fits your denture, your routine, and advice from a qualified dental professional.
How Ultrasonic Denture Cleaning Machines Work
How to Choose an Ultrasonic Denture Cleaning Machine
Ultrasonic denture cleaners use high-frequency sound waves to agitate water around a denture. The vibration forms tiny bubbles, which collapse and loosen food particles and some surface deposits. This process is called cavitation. You may see the water ripple, but the cleaning action happens in small gaps around clasps and grooves. The sound is not doing the cleaning alone; solution choice and cleaning time matter, too.
A Cochrane review from 2016 assessed six studies of denture-cleaning methods. It found the evidence too limited to identify one best method. That is a useful caution: an ultrasonic bath can assist cleaning, but it should not be treated as a proven replacement for brushing or a recommended soaking routine. Check that the denture material is suitable for ultrasonic cleaning, and follow the maker’s instructions. A cracked plate or loose fitting may need professional attention, not a longer cleaning cycle.
Tips: Use cool or lukewarm water unless the instructions say otherwise. Place the denture fully under the water, and avoid letting it rest against the tank. Brush gently afterward if needed. Inspect the surface in good light; missed residue can hide in narrow grooves. The bubbles are small. The results can vary.
How Ultrasonic Denture Cleaning Machines Work
Ultrasonic cleaners use high-frequency sound waves to create cavitation bubbles in the cleaning liquid. When the bubbles collapse, they help loosen debris from surfaces and small crevices.
Choosing a frequency: These are example frequencies used in ultrasonic cleaning, not a ranking of denture-cleaning performance. Many consumer units operate near 40 kHz. Follow the cleaner and denture manufacturers’ instructions, and check the device’s specifications before buying.
Check Denture Materials and Cleaning Requirements
Before choosing an ultrasonic denture cleaner, identify every material in the appliance. Full acrylic bases, cobalt-chromium frameworks, flexible resins, soft liners, and metal clasps may respond differently to vibration, heat, and detergents. Ask your dentist or dental laboratory if the material is unclear. Small parts matter. An older repair or reline may need gentler care than the main base.
Check the appliance’s care instructions, including recommended water temperature and approved cleaning solutions. Avoid assuming that one cycle suits every denture. Some soft liners and flexible materials can be damaged by unsuitable chemicals or excessive heat; attachments and clasps also deserve attention. A Cochrane review of six trials involving 408 adults found low-certainty evidence for denture-cleaning methods. It does not establish one ultrasonic setting as safe or effective for every material (de Souza et al., Cochrane Database of Systematic Reviews, 2016).
Match the cleaner to the actual task: removing daily debris is different from addressing stubborn deposits. Rinse the denture first, use a compatible solution, and inspect the surface and fit after cleaning. If the appliance becomes rough, cloudy, or loose, stop and ask a dental professional. The machine may be convenient, but material compatibility is easy to overlook.
How to Choose an Ultrasonic Denture Cleaning Machine - Check Denture Materials and Cleaning Requirements
| Denture Material or Situation | Cleaning Requirement | Useful Machine Features | Cleaning Liquid | Important Cautions |
|---|---|---|---|---|
| Full or partial dentures made from acrylic resin | Gentle, regular cleaning to loosen food debris and plaque deposits. | A denture-sized tank, removable basket, and a simple timed cycle. Follow the denture maker’s recommended cycle duration. | Water or a denture-cleaning solution specifically labeled as suitable for acrylic dentures. | Ultrasonic cleaning does not replace brushing. Avoid boiling or very hot water, which can distort some denture materials. |
| Partial dentures with metal clasps or a metal framework | Clean around joints and clasps while limiting the risk of corrosion or surface damage. | A stable basket that keeps the denture off the tank bottom; a timer helps control exposure. | Water or a solution confirmed as compatible with both the metal and resin components. | Avoid chlorine bleach and other cleaners that are not approved for the specific metal. Follow the denture manufacturer’s care instructions. |
| Dentures with a soft liner or resilient lining | Use a cleaning method that will not roughen, detach, or otherwise damage the lining. | Adjustable or short-cycle operation can be useful only if the denture maker or dental professional confirms ultrasonic cleaning is suitable. | A liner-compatible denture cleanser, used as directed. | Some soft liners may be affected by ultrasonic cleaning or particular chemicals. Confirm compatibility before using a machine. |
| Flexible resin dentures | Gentle cleaning with products suitable for the specific flexible material. | A roomy tank and basket that prevent bending or contact with hard surfaces. | Only a cleanser approved for that flexible denture material. | Materials and care instructions vary. Do not assume that a cleaner suitable for acrylic dentures is also suitable for flexible dentures. |
| Dentures with heavy deposits or hard-to-reach areas | Loosen deposits before careful brushing; persistent hardened tartar may need professional cleaning. | A removable basket and a clearly controlled timer. Choose a tank large enough to submerge the denture without crowding it. | Water or a compatible denture-cleaning solution, following its label. | Do not lengthen or repeat cycles beyond the denture or solution instructions. Ultrasonic cleaning may not remove hardened deposits. |
| Daily cleaning routine | Remove and clean dentures regularly, then rinse them thoroughly before wearing. | Easy-to-clean tank surfaces, straightforward controls, and a basket that can be rinsed after use. | Use fresh water or a denture cleanser according to its directions. | Do not place dentures in the mouth while a cleaning cycle is running. Keep the machine and cleaning liquids out of children’s reach. |
| Choosing between machine specifications | Prioritize safe compatibility and convenient use over maximum power or extra features. | Check tank dimensions, timer settings, basket design, cleaning instructions, and availability of replacement parts. | Confirm that the machine instructions permit the intended liquid; some machines require water only. | There is no single cycle setting suitable for every denture. Use the denture and machine instructions, or ask a dental professional if unsure. |
Selection tip: Check the denture manufacturer’s care instructions first. When material compatibility is uncertain—especially for metal parts, flexible resin, or soft liners—ask a dentist or dental technician before using ultrasonic cleaning.
Compare Tank Size, Frequency, and Cleaning Settings
When choosing an ultrasonic denture cleaner, check that the tank can fully cover your denture without forcing it against the sides. A compact tank works for one appliance, but a larger one may suit full and partial dentures. Extra space is useful, though a needlessly large tank can waste water and cleaning solution. Look for a removable basket; it keeps the denture from resting directly on the tank floor.
Frequency matters, but it is not a simple measure of cleaning power. Many household units operate near 40 kHz, a common range for small cleaning tasks. Compare specifications, but do not choose by frequency alone. The denture’s material, solution, and cycle settings all affect results. A built-in timer is helpful. Start with a short cycle and inspect the appliance before repeating it. Longer is not always better, especially for dentures with soft liners or delicate fittings. Check care instructions from the denture provider before using ultrasound.
Tips: Use a cleaning solution approved for dentures, and follow the machine’s fill line. Avoid very hot water. It is tempting to treat a cleaner as a complete replacement for brushing, but it is better used alongside regular manual cleaning. If the denture has metal parts or repairs, confirm ultrasonic cleaning is suitable.
Assess Safety Features and Ease of Maintenance
A denture cleaner should feel secure on the counter, with a snug lid and a tank that does not wobble when filled. Check for an automatic shutoff or lid interlock, and make sure the power cord stays clear of the water. That matters. The housing should remain cool during normal cycles, while the controls should be simple enough to use without guessing. A timer and clear cycle indicators help prevent unnecessary operation. Ultrasonic cleaning can loosen debris, but it does not necessarily disinfect dentures. Follow the denture maker’s care instructions, especially for soft liners or delicate materials. Not always obvious.
Maintenance is easier when the tank has smooth, accessible corners and a drain or opening that allows water to be poured out safely. Unplug the unit before emptying or wiping it. Use a soft cloth, not an abrasive pad, which can scratch the tank and make residue harder to remove. After each use, rinse away loosened debris and leave the lid open so the interior can dry. If hard-water spots appear, follow the machine’s cleaning guidance rather than testing a strong household chemical. Inspect the cord and plug now and then; stop using the machine if either looks damaged. I would not choose a model based on extra settings alone. A complicated control panel can become one more thing to maintain.
Match Machine Performance to Your Budget and Routine
How to Choose an Ultrasonic Denture Cleaning Machine
Match the machine to your daily routine, not just its feature list. If you clean dentures every evening, a compact unit with a simple timer may be enough. Check that the tank fits your appliance without forcing it against the sides. A removable basket can make lifting dentures out easier, especially with wet hands. If you clean several items at once, a larger tank may save time, but it also takes more counter space. This trade-off is easy to misjudge.
Tips: Check the denture maker’s care instructions before using ultrasonic cleaning. Use the recommended solution and water level. Ultrasonic cleaning can loosen debris, but it does not replace brushing or routine care.
Set a budget around features you will actually use. A basic model may suit occasional cleaning, while frequent use can make a sturdy tank and clear controls worth paying more for. Heating and extra cycles are not automatically better; follow appliance guidance, since some materials or attachments may need gentler care. Compare cleaning time, ease of draining, and how simple the unit is to keep dry between uses. A machine that is awkward to clean may end up sitting unused.
FAQS
No. It can loosen debris, but it does not necessarily disinfect dentures or replace brushing and routine care.
Choose a stable unit with a snug lid, automatic shutoff or lid interlock, and clear cycle indicators. That matters.
Keep the power cord away from water, and unplug the unit before emptying or wiping it. Follow the appliance’s care instructions.
Make sure your denture fits without pressing against the sides. A larger tank may help with several items, but uses more counter space.
It can make lifting dentures out easier, especially with wet hands. A small detail, but practical.
Rinse away loosened debris, wipe with a soft cloth, and leave the lid open to dry. Avoid abrasive pads.
Not always. Check care instructions, since delicate materials or soft liners may need gentler treatment. I might overvalue extra settings.
Match the price to your routine. Frequent use may justify a sturdy tank and simple controls; occasional use may not. A trade-off worth checking.
Conclusion
Choosing an Ultrasonic Denture Cleaning Machine starts with understanding how ultrasonic waves create tiny bubbles in water or cleaning solution to loosen debris from hard-to-reach surfaces. Before buying, check the materials in your dentures and any care instructions, since not every material or component is suited to the same cleaning method. Select a machine and cleaning solution that fit those requirements, and avoid assuming that a stronger setting is always better.
Compare tank capacity, operating frequency, and available cleaning settings with the size and type of items you plan to clean. A larger tank may offer more room, while adjustable settings can provide flexibility for different cleaning needs. Look for practical safety features, clear controls, and a tank that is easy to empty and maintain. Finally, consider how often you will use the machine and how much you want to spend. The best choice is one that fits your routine, cleans effectively, and is simple to care for over time.

Blog Tags: